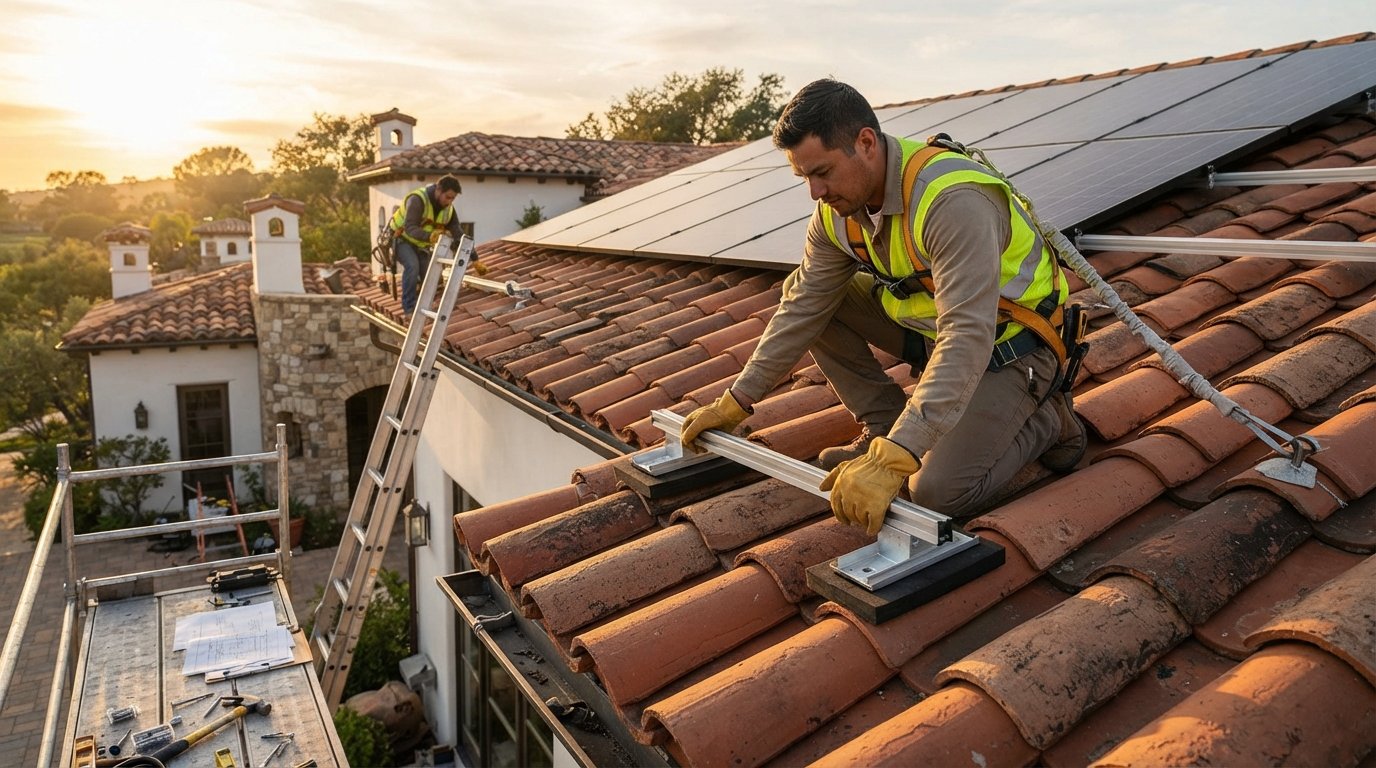
Solar Panel Mounting for Flat Tile and Historic Roofs
Solar panel mounting for flat tile and historic roofs protects fragile tiles and preserves character. Call 8334344023 for vetted installer quotes.

By Maya Hayes
Learn more about Solar Panel Installation and Repair for guides, costs, and what to expect.
Compare Solar Panel Installation and Repair Pros Near You

Enter your ZIP code to compare top-rated local professionals and request free quotes.
Installing solar panels on a flat tile or historic roof is one of the most technically demanding projects in residential solar. Standard mounting hardware designed for asphalt shingles simply will not work on fragile clay tiles or century-old slate. Push too hard in the wrong spot and you can crack a tile, void a preservation easement, or create a leak that costs thousands to repair. Get it right, though, and you can cut your electric bill by hundreds of dollars per year without changing the character of your home. This guide walks through the mounting systems, structural considerations, and approval steps that make solar panel mounting for flat tile and historic roofs both safe and visually respectful.
Why Flat Tile and Historic Roofs Demand Specialized Mounting
Flat tile roofs, including clay, concrete, and terracotta, are common across the Southwest, Florida, and California. Historic roofs often feature slate, cedar shake, standing seam metal, or ornamental tile. Each of these surfaces shares one trait: it is either fragile, protected by preservation rules, or both. Standard solar mounts rely on lag bolts driven directly through the roof deck, with flashing layered over the penetration. On a tile roof, that approach fails because the tile itself is the waterproof layer in many assemblies, and drilling through it invites leaks and cracks.
Historic roofs add a second layer of complexity. Local historic preservation commissions, state historic preservation offices, and even federal tax credit rules can restrict what you can attach to a contributing structure. The National Park Service, for example, treats solar installations under the Secretary of the Interior's Standards for Rehabilitation, which favor reversible mounts and minimal visual impact. That means your mounting plan may need approval before a single bracket goes up.
Structural capacity matters too. Older homes were not engineered for the added dead load of a photovoltaic array, which typically adds 2.5 to 4 pounds per square foot. A structural engineer may need to verify rafters, collar ties, and ridge beams before installation. Skipping this step risks sagging, tile cracking, or worse.
Mounting Options for Flat Tile Roofs
Flat tile roofs offer several mounting pathways, each with trade-offs in cost, waterproofing, and reversibility. The right choice depends on your tile profile, roof pitch, and whether the tiles are curved (Spanish barrel) or interlocking (flat concrete).
Here are the four most common approaches used by experienced installers:
- Tile replacement mounts: A metal bracket replaces a section of tile and is flashed to the underlayment, preserving the tile line above and below.
- Tile hooks with flashed standoffs: Stainless hooks slip under the tile and attach to the rafter, with a flashed base that seals the penetration.
- Ballasted non-penetrating systems: Weighted trays sit on the roof surface, ideal for flat or low-slope tile where drilling is impossible.
- Adhesive or chemical bonding: Rare and generally discouraged for tile because thermal cycling weakens the bond over time.
Tile replacement mounts are the gold standard for curved tile because they maintain the roof's water-shedding geometry. Flashed standoffs work well on interlocking flat tile where the profile allows a clean seal. Ballasted systems avoid penetrations entirely but require a flat roof with adequate load capacity and wind uplift calculations. Your installer should calculate uplift based on ASCE 7 wind maps for your ZIP code.
Waterproofing details separate professional work from amateur work. Every penetration needs a two-stage seal: a primary flashing that diverts water and a secondary sealant rated for high UV and thermal movement. Never rely on silicone alone. If you want to compare how modern inverters and monitoring hardware pair with these mounts, a guide on AI in solar panel efficiency can help you match the mounting plan to the electronics.
Mounting on Historic Roofs: Slate, Cedar, and Ornamental Tile
Historic roofs require a preservation-first mindset. Slate and cedar shake cannot be drilled without risking splits and rot, and ornamental tile may be irreplaceable if a piece cracks. The best practice is to avoid penetrations entirely wherever possible.
Three strategies dominate historic installations:
- Ground-mounted arrays: Panels sit on posts or ballasted frames in the yard, leaving the roof untouched and fully reversible.
- Detached structures: Garages, barns, or carports that are not contributing to the historic designation can host panels without triggering review.
- Reversible roof mounts: Clamps, hooks, or seam clamps that attach without drilling, such as standing seam metal clamps or slate hooks with hidden brackets.
Ground mounts are often the cleanest path for historic homes because they sidestep preservation review entirely in many jurisdictions. They also make maintenance easier and allow optimal tilt and orientation. Detached structures work well when the main house has a steep, fragile roof but the property includes a modern outbuilding. Reversible roof mounts suit standing seam metal roofs, which are common on early 20th century homes and accept non-penetrating seam clamps beautifully.
If penetrations are unavoidable, use slate hooks or tile hooks that replace a single shingle or tile rather than drilling through it. Keep the number of penetrations to an absolute minimum, cluster them near the ridge or in a hidden valley, and document every penetration with photos for future roofers. Always consult your state historic preservation office before ordering hardware.
Structural and Code Considerations
Building codes treat solar arrays as permanent roof-mounted equipment. That means your installation must satisfy the International Residential Code, local amendments, and in many cases the International Existing Building Code. Key checks include dead load, live load, wind uplift, and seismic anchorage. Older homes may need sistered rafters or added blocking to handle the load.
Fire setbacks matter as well. Most jurisdictions require a 3-foot clear path along ridges and edges for firefighter access. Historic districts sometimes waive these setbacks when visual impact is a concern, but that waiver must be in writing. Your permit application should include structural calculations, a roof plan, and a mounting detail drawing.
Electrical code also applies. Rapid shutdown, grounding, and arc-fault protection are mandatory under NEC 690. Historic homes with knob-and-tube wiring may need a service upgrade before interconnection. A licensed electrician should evaluate the main panel and meter before installation begins.
Permits, Preservation Review, and Incentives
Permitting for solar panel mounting for flat tile and historic roofs typically involves three tracks: building permit, electrical permit, and historic review. In designated historic districts, you may need a Certificate of Appropriateness or a Certificate of No Effect from the local preservation commission. Review timelines range from two weeks to six months, so plan accordingly.
Federal incentives can offset a significant portion of the cost. The residential clean energy credit covers 30 percent of qualified solar expenditures, including mounting hardware, labor, and permits. State and utility rebates may add thousands more. Historic preservation easements, however, can complicate eligibility, so confirm with a tax advisor before claiming the credit.
If you want a no-obligation way to compare installers who understand tile and historic roofs, FreeSolarPowerQuotes connects homeowners with vetted solar providers across the United States. Getting multiple quotes helps you see how different companies handle tile hooks, flashing details, and preservation review.
Installation Workflow: What to Expect
A well-run tile or historic roof installation follows a predictable sequence. Knowing the steps helps you ask better questions and spot shortcuts.
- Site assessment: A structural review, roof condition check, and shade analysis.
- Design and engineering: Mounting plan, electrical single-line diagram, and wind uplift calculations.
- Permitting and preservation review: Submit drawings to the building department and historic commission.
- Roof preparation: Repair or replace damaged tiles before any mounting hardware goes up.
- Mounting and flashing: Install brackets, flash each penetration, and verify watertightness.
- Panel and electrical installation: Racking, modules, inverter, and interconnection.
- Inspection and commissioning: City inspection, utility approval, and system activation.
Roof preparation is the step most often skipped. If tiles are cracked or underlayment is at the end of its life, replace it before mounting. Otherwise you will pay twice: once for solar and again for a roof tear-off that requires removing the array. Ask your installer to document roof condition with photos before and after.
Commissioning should include a monitoring setup so you can track production. Pairing your array with smart monitoring and AI-driven optimization can squeeze more savings out of every kilowatt-hour. If your roof cannot host a full array, consider a hybrid approach: partial roof mounting plus a ground-mounted section.
Cost Factors and Long-Term Value
Mounting costs for tile and historic roofs run higher than asphalt shingle installations. Expect to pay 15 to 30 percent more for labor and hardware because of the extra care, specialty brackets, and flashing labor. Ballasted systems can be cheaper on flat roofs, while slate and ornamental tile often require custom fabrication.
Long-term value comes from durability and reversibility. A properly flashed tile mount can last 25 years or more without a leak. A reversible historic mount preserves your home's character and resale value. Both reduce the risk of expensive repairs down the road.
Maintenance is minimal but not zero. Inspect flashing annually, clear debris from ballasted trays, and check for cracked tiles after storms. A quick visual check each spring prevents small issues from becoming expensive ones.
Choosing the Right Installer
Not every solar company has experience with tile or historic roofs. Ask for references from at least three projects with similar roofing. Request photos of flashing details and confirm the installer carries general liability and workers compensation insurance. Verify licensing with your state contractor board.
Ask how they handle preservation review, whether they use in-house crews or subcontractors, and what warranty covers roof penetrations. A strong workmanship warranty of 10 years or more is a good sign. Finally, confirm the installer will pull all permits and coordinate inspections, because unpermitted work can void your homeowner insurance.
Solar panel mounting for flat tile and historic roofs rewards careful planning. With the right hardware, a preservation-aware design, and a qualified installer, you can generate clean energy for decades without compromising the roof or the history beneath it.