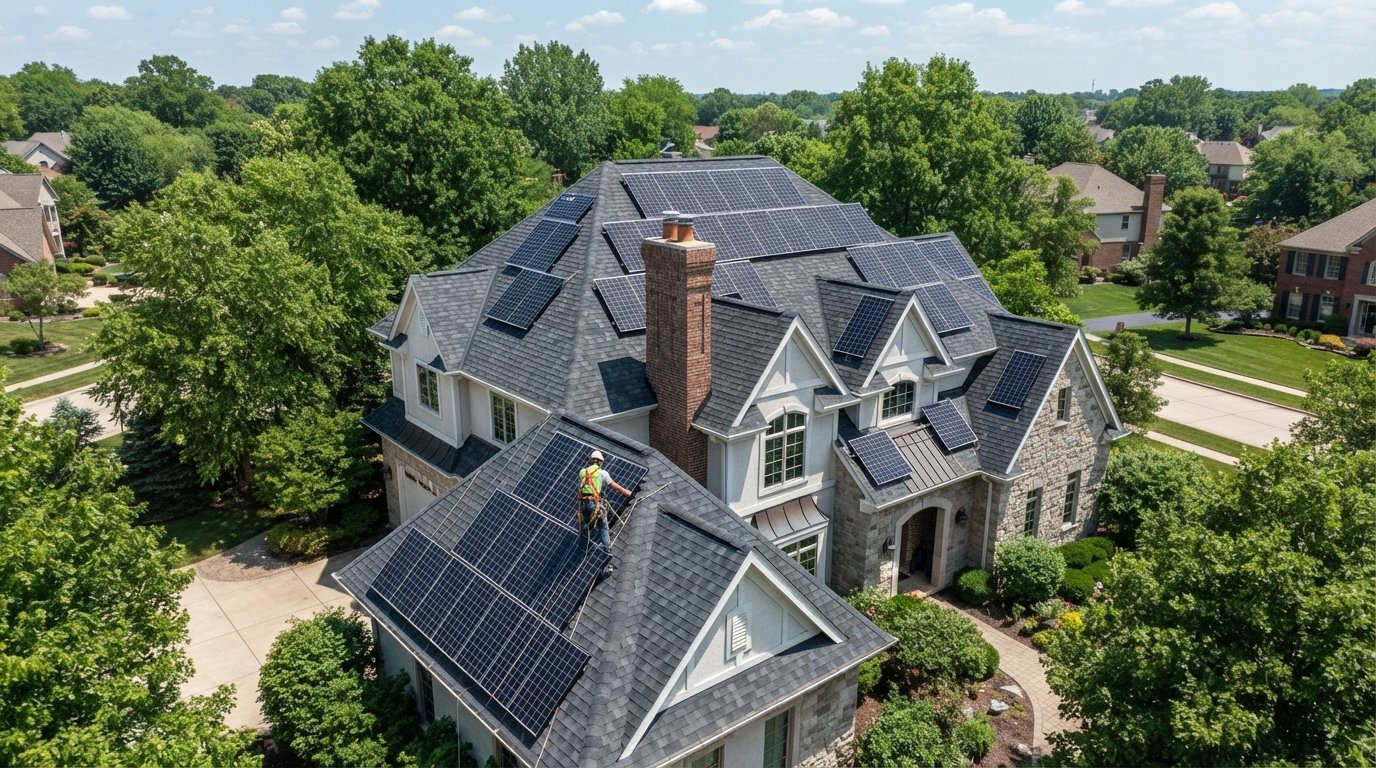
Solar Panel Layout for Irregular and Complex Roofs
Master solar panel layout for irregular and complex roofs. Call (833)-434-4023 to maximize energy production on challenging rooflines.

By Dylan Harris
Learn more about Solar Panel Installation and Repair for guides, costs, and what to expect.
Compare Solar Panel Installation and Repair Pros Near You

Enter your ZIP code to compare top-rated local professionals and request free quotes.
Your roof is not a flat, empty canvas. Dormers, valleys, chimneys, and multiple gables make solar panel layout for irregular and complex roofs a puzzle that demands careful planning. Yet these challenging rooflines are exactly where smart design can unlock hidden savings. With the right approach, you can turn awkward planes and shaded corners into a productive solar array. This guide walks you through the strategies professionals use to maximize energy harvest on complicated roofs, from string design to site surveys, so you can make informed decisions and avoid costly mistakes.
Understanding the Challenges of Complex Roofs
Irregular roofs come in many forms: L-shaped footprints, multiple intersecting gables, steep pitches, and an assortment of obstructions like vent stacks, skylights, and chimneys. Each feature affects how sunlight reaches the panels and how you can wire them together. The core challenge is that solar panels perform best when they face the same direction and tilt, but complex roofs rarely offer large, uniform planes. Instead, you get a patchwork of orientations and shaded pockets. Without careful planning, these variations can drag down the entire system's output, especially if panels on different planes are wired into the same string.
Another issue is physical space. Dormers and valleys break up the roof into smaller sections, limiting how many panels you can fit. Setback requirements for fire code and access further reduce usable area. Homeowners often assume their roof is unsuitable for solar, but that is rarely true. The key is to design a layout that treats each plane as its own sub-array and uses advanced electronics to manage mismatches. In the following sections, we will explore how to handle multiple roof planes, when to consider ground mounts, and how to choose the right equipment for mixed-orientation arrays.
Designing for Multiple Roof Planes
When your roof has several distinct planes, the best practice is to divide the solar array into separate sub-arrays, each with its own set of panels and wiring. This approach prevents panels on one plane from being limited by panels on another. For example, if you have east- and west-facing roof sections, you can wire each orientation to its own string or use microinverters to isolate each panel. In a traditional string inverter system, panels on different planes would be forced to operate at the lowest common denominator, which can slash production. By using multiple maximum power point trackers (MPPTs) or microinverters, you allow each sub-array to perform at its own optimum.
String sizing becomes more complex with multiple planes. You need to calculate the voltage and current for each string based on the number of panels and their orientation. If one plane has heavy shading in the morning and another in the afternoon, you can design strings that are electrically independent. Many modern inverters come with two or more MPPTs, which is often sufficient for two or three distinct orientations. For more complex roofs with many small planes, microinverters or DC optimizers are usually the better choice because they provide per-panel optimization and simplify wiring. In our guide on top solar panel roof mounts, we explain how mounting hardware can be adapted to different roof surfaces, which is essential when dealing with irregular planes.
Another consideration is physical layout. Panels should be grouped logically to minimize wiring runs and to keep the installation neat. On a complex roof, you might have to use smaller panel sizes or orient panels vertically to fit odd-shaped areas. Some installers use a technique called "panel staggering" to work around obstructions while maintaining electrical balance. The goal is to maximize the number of panels while keeping each sub-array electrically sound. A professional site survey will identify all viable mounting zones and flag any obstructions that could affect performance.
String Inverters vs. Microinverters vs. Optimizers
Choosing the right power electronics is critical for irregular roofs. Traditional string inverters are cost-effective for simple, uniform roofs, but they struggle with complex layouts because they lack per-panel optimization. When panels on different planes or with partial shading are wired together, the entire string's output can drop to the level of the weakest panel. This is known as the "Christmas light effect," and it can significantly reduce energy harvest on a roof with mixed orientations or shade paths.
Microinverters solve this problem by converting DC to AC at each panel, allowing each panel to operate independently. They are ideal for complex roofs because they eliminate the need for string sizing and are less affected by shading or orientation differences. However, they come at a higher upfront cost and may require more wiring. DC optimizers, on the other hand, perform maximum power point tracking at each panel and then send DC power to a central inverter. They are a middle ground: they provide per-panel optimization and are often more affordable than microinverters. Optimizers also allow for module-level monitoring, which is useful for diagnosing issues on a complex array.
For a roof with multiple planes, the tradeoffs are clear. Microinverters offer the most flexibility and are often recommended for highly irregular roofs with many small planes and shading. Optimizers are a good choice if you want per-panel optimization with a central inverter, which can be more efficient and easier to maintain. String inverters with multiple MPPTs can work if the roof can be divided into a few distinct orientations with minimal shading. Your installer should perform a shade analysis and consider your budget and energy goals to recommend the best option. In many cases, a hybrid approach using optimizers on the most complex sections and a string inverter for simpler planes can be cost-effective.
When Ground Mounts or Carports Beat a Difficult Rooftop
Sometimes the best layout for an irregular roof is no roof at all. If your roof has too many obstructions, heavy shading, or structural issues, a ground mount or carport solar system can be a superior alternative. Ground mounts allow you to orient panels at the optimal tilt and azimuth, which often results in higher energy production than a compromised rooftop layout. They also simplify maintenance and can be designed to avoid shading from trees or buildings. For homeowners with available land, a ground mount can be a cost-effective way to go solar without the constraints of a complex roof.
Carports and solar canopies are another option. They provide dual benefits: they shade a vehicle or patio while generating electricity. These structures can be designed to fit the available space and can be oriented for maximum sun exposure. They are particularly useful for properties with limited roof space or roofs that are unsuitable for solar. However, ground mounts and carports require space, and they may have different permitting requirements. They also add to the balance-of-system costs, such as trenching for wiring and additional mounting hardware. But when a rooftop layout would require many microinverters or optimizers to handle a fragmented array, a ground mount can sometimes be more economical and productive.
Another consideration is future expansion. A ground mount or carport can be sized to allow for additional panels later, which is harder on a complex roof with limited space. If you are planning to add an electric vehicle or battery storage, having a larger solar array on a ground mount can be advantageous. Your installer can help you compare the levelized cost of energy (LCOE) for a rooftop vs. ground mount design, taking into account the specific challenges of your roof. In some cases, a combination of rooftop and ground mount may be the best solution, especially if the roof has some usable planes and the yard has space for additional panels.
Site Survey and Design Software: Flagging Constraints Early
A thorough site survey is the foundation of any successful solar installation, but it is especially important for irregular roofs. The survey should document the roof's geometry, including pitch, azimuth, and dimensions of each plane. It should also note all obstructions: chimneys, vent stacks, skylights, satellite dishes, and shading from trees or nearby buildings. The surveyor should take measurements and photos from multiple angles, and ideally use a drone to capture a complete view of the roof. This data is then used to create a 3D model of the roof, which serves as the basis for the layout design.
Design software like Aurora Solar, Helioscope, or OpenSolar allows installers to simulate shading and calculate energy production for each panel. These tools can automatically suggest panel placements and identify constraints such as setback requirements and obstructions. They can also model different string configurations and compare the performance of microinverters vs. optimizers. By flagging constraints early, you avoid surprises during installation and can optimize the layout for maximum yield. For example, the software might reveal that a certain section of the roof is shaded during peak hours, so it is better to leave that area empty or use it for a smaller sub-array with optimizers.
Homeowners can also use online tools to get a preliminary estimate, but a professional survey is essential for complex roofs. The surveyor should check the structural integrity of the roof and the condition of the roofing material. If the roof needs replacement soon, it may be wise to replace it before installing solar to avoid the cost of removing and reinstalling panels later. The survey should also include an electrical assessment to determine the capacity of the main panel and the best location for the inverter and disconnects. All these factors feed into the final layout and ensure that the system is safe, code-compliant, and optimized for your roof's unique characteristics.
Avoiding Common Oversights: Vent Stacks, Skylights, and Shade Paths
One of the most common mistakes in solar panel layout for irregular and complex roofs is overlooking small obstructions that cast long shadows. Vent stacks, plumbing vents, and chimneys may seem minor, but they can shade panels and reduce production. Even a small vent pipe can cast a shadow that affects multiple panels, especially in the morning or late afternoon. Skylights are another culprit: they are often placed in the middle of a roof plane and can disrupt the layout. The best practice is to map out all obstructions and their shade paths using a sun path analysis. This allows you to position panels where they will receive maximum sunlight throughout the day.
Shade paths also include trees and nearby buildings. A tree that is far away in the winter may cast a shadow in the summer when the sun is higher. Deciduous trees lose their leaves in winter, which can be beneficial, but evergreen trees cast shade year-round. The design software should account for these seasonal variations. If shading is unavoidable, you can use microinverters or optimizers to mitigate its impact. Another oversight is ignoring the roof's structural capacity. Older roofs may not support the additional weight of solar panels, especially on steep pitches. A structural engineer may be needed to verify that the roof can handle the load.
Finally, do not forget about access and maintenance. Panels should be positioned to allow safe access for cleaning and service. Setback requirements from the fire code may dictate how close panels can be to the roof edges and ridges. These setbacks are designed to provide a path for firefighters and to prevent panels from obstructing ventilation. Your installer should be familiar with local codes and incorporate them into the layout. By addressing these oversights early, you can avoid costly redesigns and ensure that your solar system performs reliably for decades.
Maximizing Savings with Smart Layout Choices
The ultimate goal of any solar panel layout is to maximize energy production and savings. On complex roofs, this means making strategic choices about which planes to use and which to skip. Sometimes it is better to install fewer panels on the most productive planes than to cram panels onto every available surface. For example, a south-facing plane with no shade is ideal, while a north-facing plane may produce very little. By focusing on the best areas, you can reduce the number of microinverters or optimizers needed and lower the overall cost. Energy production modeling can show you the return on investment for each potential panel location, helping you prioritize.
Another way to maximize savings is to combine solar with other energy upgrades. For instance, if you are planning to move or remodel, you can integrate solar into the design. If you are relocating, resources like Moving.Homes offer practical advice for homeowners, including tips on preparing your home for sale or upgrade. But for solar, the key is to work with a qualified installer who understands complex roofs. They can help you navigate incentives and financing options, such as the federal tax credit, which can significantly reduce your upfront cost. You can also use tools like SolarEnergy.ai's solar savings calculator to estimate your payback period based on your specific layout.
Finally, consider the future. If you plan to add battery storage or an electric vehicle, you may want to size your system larger. A complex roof might limit your ability to expand later, so it is worth designing for future needs now. Your installer can help you plan for a scalable system, perhaps by leaving space for additional panels or by choosing an inverter with spare capacity. By thinking ahead, you can ensure that your solar investment continues to pay off even as your energy needs change.
Navigating the intricacies of solar panel layout for irregular and complex roofs requires expertise and careful planning. From dividing the array into sub-arrays to choosing the right power electronics, every decision impacts performance. By conducting a thorough site survey, using advanced design software, and avoiding common oversights, you can turn even the most challenging roofline into a solar asset. If you are ready to explore your options, connect with a local solar professional who can assess your roof and design a system tailored to your home's unique architecture.