Solar Security Integration: Powering Protection
Discover how electrical security system integration with solar panels keeps cameras and alarms running during outages, saving money and boosting safety.

By Dylan Harris
Learn more about Solar Panel Installation and Repair for guides, costs, and what to expect.
Compare Solar Panel Installation and Repair Pros Near You

Enter your ZIP code to compare top-rated local professionals and request free quotes.
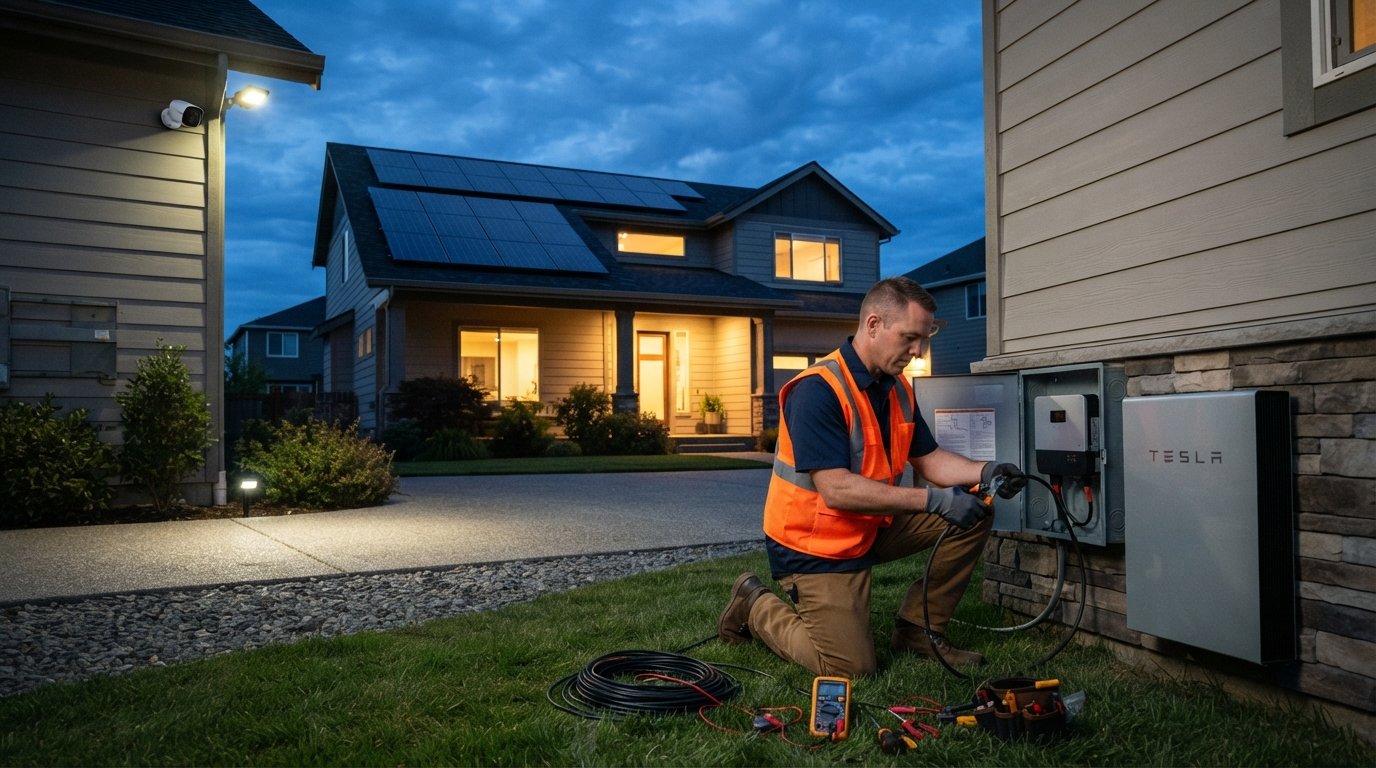
When you invest in a solar array, you are not just cutting monthly energy bills. You are also creating an opportunity to rethink how your entire property is protected. The same direct current (DC) power that flows from your panels can keep cameras rolling, sensors active, and alarms responsive, even when the grid goes dark. This is not a futuristic concept. Electrical security system integration with solar panels is a practical upgrade that more homeowners and businesses are adopting in 2026. It merges two systems that share a common goal: resilience. A grid-tied solar setup without a security link leaves a gap, because a standard alarm is useless during an outage. By connecting the two, you turn your energy producer into a guardian.
Think about what happens during a blackout. Most traditional security systems rely on battery backups that last a few hours at best. After that, your cameras go offline, motion detectors stop scanning, and the smart locks become dumb metal. A solar powered security system, by contrast, taps into an endless fuel source. The sun recharges the batteries every day. When paired with a storage unit, the combination can keep your defenses running for days or even weeks. This article walks you through the core components, the design decisions, the costs, and the installation steps, so you can decide if this integration is right for your home or facility.
Why Pair Security with Solar Power?
The first reason is continuity. A security system is only valuable when it is active. If a storm knocks out utility power, a burglary risk often rises, yet that is exactly when conventional alarms fail. Solar panels generate electricity during daylight, and with a battery bank, they store enough to power security hardware through the night. This independence from the grid is the foundation of a robust protection plan.
The second reason is cost efficiency. Security equipment does not consume massive amounts of energy, but it runs 24/7. A typical camera uses between 4 and 15 watts. A complete system with eight cameras, sensors, and a hub might draw 100 to 150 watts continuously. Over a year, that adds up. By feeding these devices from your solar array, you offset that load, which means your security system operates for free after the initial investment. When you calculate the total cost of ownership, the savings are tangible.
Third, there is the environmental angle. Homeowners who choose solar often do so to reduce their carbon footprint. Adding security loads onto that clean energy source means you are not using fossil-fuel electricity for surveillance. It aligns your safety measures with your sustainability goals. For businesses, this can also support corporate social responsibility reports and green certifications.
Finally, integration adds property value. A home with a solar system is already attractive. Add a professionally integrated security layer, and you have a differentiator. Buyers see lower utility bills and a safer environment. Appraisers are starting to recognize these combined systems as assets. If you plan to sell in the future, this upgrade can make your listing stand out.
Core Components of a Solar Powered Security System
To build an effective integrated system, you need to understand the parts that make it work. The main components break down into energy generation, storage, and distribution, plus the security hardware itself.
- Solar panels: These convert sunlight into DC electricity. You can use the main roof array or a smaller dedicated set for security.
- Charge controller: This regulates the voltage from the panels to prevent overcharging the batteries.
- Battery bank: This stores excess energy for nighttime use or cloudy days. Lithium-ion batteries are common, but lead-acid still works on a budget.
- Inverter: This converts DC into alternating current (AC) for devices that need it, or you can choose DC-powered security equipment.
- Security devices: Cameras, motion sensors, door/window contacts, sirens, and a central hub or recorder.
- Network and connectivity: Routers, switches, and possibly cellular backup to keep data flowing.
Each component must match the others. For example, a charge controller rated for 10 amps cannot handle a 500-watt panel array. Similarly, a battery bank with 100 amp-hours of capacity will not run a high-power camera system for long. Sizing is critical, and that is where a professional energy survey becomes valuable. An expert can measure your actual security load and design the solar and battery capacity to meet it.
One important distinction is between AC-coupled and DC-coupled systems. AC-coupled setups use a standard inverter and feed AC power to security devices through outlets. DC-coupled systems run devices directly from batteries, which is more efficient because it skips the inverter step. Many modern security cameras and sensors are available in 12V or 24V DC versions, making DC coupling attractive. However, AC is more flexible for integrating with existing home wiring and smart home hubs.
Designing the Right Power Architecture
Before you buy any equipment, you need a clear picture of your security load. Start by listing every device you plan to power. Note its wattage and the hours it runs per day. Cameras often run continuously, while motion sensors only draw power when triggered. Add a safety margin of 20 to 30 percent for unexpected spikes or future expansion.
Next, determine your solar resource. If you live in Arizona, you have more sun hours than someone in Maine. The National Renewable Energy Laboratory (NREL) provides peak sun hour maps for the United States. A typical home in Phoenix gets around 6 peak sun hours per day, while Seattle gets closer to 3.5. This number directly affects how many panels you need.
Once you have the daily energy requirement in watt-hours, divide it by the peak sun hours to get the minimum solar array size. For example, if your security system needs 2,400 watt-hours per day and you receive 6 peak sun hours, you need at least 400 watts of panels. Add efficiency losses of about 20 percent, so a 500-watt array is safer.
Battery sizing is equally straightforward. Decide how many days of autonomy you want, meaning how many days the system should run without sun. Multiply your daily load by that number. Then, account for battery depth of discharge (DoD). Lithium batteries can safely discharge to 80 or 90 percent, while lead-acid should not go below 50 percent. So, for 2,400 watt-hours and two days of autonomy, you need 4,800 watt-hours of usable capacity. Divide that by 0.8 for lithium, giving you 6,000 watt-hours, or 500 amp-hours at 12 volts.
This process is not guesswork. It requires careful calculation. If you are not comfortable with electrical math, hire a professional to do the load analysis. An undersized system leads to frequent outages, which defeats the purpose of security. An oversized system wastes money.
Selecting Security Equipment That Plays Nicely with Solar
Not all security devices are created equal when it comes to solar integration. Some draw too much power for efficient battery operation. Others have poor standby performance. Look for equipment with low idle current and high efficiency. Power over Ethernet (PoE) cameras are a good choice because they combine data and power over a single cable, reducing wiring complexity. Many PoE cameras operate on 48V DC, which can be derived from a battery bank with a DC-DC converter.
Wireless cameras that use Wi-Fi are convenient, but they often run on batteries that need frequent recharging. Instead, choose cameras that can be powered directly from your solar system. This eliminates the need to climb a ladder to swap batteries every few months. Similarly, avoid devices that rely on cloud storage unless you have a reliable internet connection and a backup plan. Local recording to a network video recorder (NVR) is more dependable and does not depend on external servers.
Another key factor is the operating temperature range. Solar panels get hot, and batteries are sensitive to heat. Security cameras exposed to direct sunlight can overheat. Choose equipment rated for your climate. In Phoenix, that means looking for high-temperature tolerance. In northern states, cold-weather performance matters more. Read the specifications carefully.
You should also consider the communication protocol. Many modern systems use Z-Wave, Zigbee, or Wi-Fi for sensors. These protocols have different power profiles. Z-Wave devices are generally very low power, which extends battery life. However, if you are wiring them to your solar system, that is less of a concern. The bigger issue is range and reliability. A mesh network is often better for large properties.
Installation: Steps to a Seamless Integration
Installing an integrated solar security system is not a simple DIY weekend project. It involves high-voltage DC from panels, battery storage, and low-voltage control wiring. Mistakes can lead to shocks, fires, or equipment damage. That is why professional installation is strongly recommended. Still, understanding the process helps you ask the right questions and ensure quality work.
Step 1: Site Assessment and Load Calculation
The installer visits your property to evaluate sun exposure, shading, roof condition, and existing electrical infrastructure. They also inventory your security devices or help you choose new ones. The output is a detailed load calculation, as described earlier. This step is essential because it determines the size of every component.
Step 2: Panel Mounting and Wiring
If you are adding dedicated solar panels for security, they need to be mounted where they get maximum sun. This might be on a roof, a pole, or a ground mount. The wiring runs to a charge controller, which sits near the battery bank. Use proper conduit and disconnect switches for safety. If you are tapping into an existing solar array, the installer will connect to the appropriate busbar or combiner box.
Step 3: Battery and Inverter Installation
Batteries should be placed in a ventilated, temperature-controlled area, ideally away from living spaces. Lithium batteries are safer than lead-acid, but they still have thermal management requirements. The charge controller connects to the batteries, and the inverter connects to the battery bank. A transfer switch might be added to allow switching between solar and grid power automatically.
Step 4: Security Device Connection
Cameras, sensors, and alarms are installed at their designated locations. Each device gets a power feed from the solar system. For PoE cameras, this means running Ethernet cables back to a PoE switch that is powered by the inverter. For DC devices, use a DC distribution panel with fuses. Ensure all connections are weatherproof and properly grounded.
Step 5: Network and Software Setup
Once the hardware is connected, the network needs configuration. This includes assigning IP addresses, setting up the NVR, and enabling remote viewing via a smartphone app. If you want cellular backup, a modem with a SIM card is added. The integrator tests each device to confirm it sends alerts and records video correctly.
Step 6: Testing and Commissioning
The last step is a full system test. The installer simulates a power outage to verify that the battery backup kicks in seamlessly. They check that all security functions remain active during the outage. They also verify that the solar panels are charging the batteries correctly. After a successful test, you receive documentation and training on how to use the system.
Costs, Savings, and Return on Investment
The upfront cost of integrating security with solar varies widely. A basic setup with two cameras, a small battery, and a 200-watt panel might cost $1,500 to $3,000. A comprehensive system for a large home with eight cameras, smart locks, and a 5 kWh battery can run $8,000 to $15,000 or more. These figures include equipment and professional labor.
However, you need to look at the long-term savings. The security system's electricity consumption is offset by solar generation. If your security system draws 100 watts continuously, that is 2.4 kWh per day. At an average U.S. electricity rate of $0.17 per kWh, that is about $149 per year in avoided costs. Over a 10-year lifespan, that is nearly $1,500. Additionally, some insurance companies offer discounts for monitored security systems, which can save 5 to 20 percent on your premium. That could be another $100 to $300 per year.
There is also the value of uninterrupted protection. A single break-in can cost thousands of dollars in losses and deductibles. The peace of mind from knowing your security remains active during any outage is hard to quantify, but it is real. When you compare the cost of the solar integration to the potential loss, the return on investment becomes clear.
For those who cannot pay upfront, there are financing options. Solar loans, home equity lines, and even some security companies offer monthly plans. In some states, you can also take advantage of the federal solar investment tax credit (ITC), which currently offers a 30 percent credit on qualifying solar equipment. This credit applies to the solar panels and batteries, but not to the security devices themselves. Check the latest IRS guidelines to see what qualifies.
Maintenance and Long-Term Reliability
An integrated system requires ongoing care. Solar panels need periodic cleaning to maintain efficiency, especially in dusty areas like Phoenix. Batteries have a lifespan, typically 5 to 15 years depending on chemistry and usage. You should monitor battery health through the charge controller's display or an app. Security cameras need lens cleaning and firmware updates. Motion sensors may need battery replacements if they are not hardwired.
Most modern systems come with remote monitoring. You can check the status of your panels, batteries, and cameras from your phone. Alerts can be set up for low battery, camera offline, or motion events. This proactive approach helps you catch issues before they become failures. Annual professional inspections are also recommended. A technician can verify connections, test the transfer switch, and confirm that the system still meets your needs.
As your security needs grow, the system should be scalable. You can add more cameras or sensors without overhauling the power infrastructure, provided you left spare capacity in the battery and inverter. When designing your system, it is wise to oversize slightly to avoid a costly upgrade later. That extra 20 percent in battery capacity might only add a few hundred dollars now, but it could save thousands in future expansion costs.
If you are considering a full solar installation for your home, you should also review how your current security system can be integrated. In our guide on average electric bills with solar panels, we highlight how much homeowners can save on energy costs, which can help offset the additional expense of security integration. The same principles apply across the country, though local rates and sun hours vary.
Common Mistakes to Avoid
One frequent error is underestimating the security load. People add cameras later without checking if the battery can handle the extra draw. The result is a system that runs out of power by midnight. Always design with a buffer. Another mistake is using a single inverter for both security and general home loads. If the inverter fails, you lose security. A dedicated inverter or a critical loads panel is a better approach.
Poor placement of panels is another issue. If shading from trees or buildings covers the panels for part of the day, charging is reduced. Consider a site survey that maps sun paths across the seasons. Also, do not forget about temperature derating. Panels produce less voltage in high heat, which is counterintuitive but true. Your installer should account for your local climate.
Finally, do not ignore the network. A security system that relies on Wi-Fi without backup is vulnerable. If your internet goes down, many cameras become useless. Invest in a cellular modem or a dual-band router that can fall back to LTE. Some NVRs have built-in cellular slots. This redundancy ensures that your security system remains connected, even during internet outages.
Choosing a Professional Installer
Because this work involves both solar and security, you need a contractor with experience in both fields. Look for certifications from the North American Board of Certified Energy Practitioners (NABCEP) for solar, and relevant security licenses from your state. Ask for references from past projects that involved battery backup and security integration. A good installer will walk you through the load calculation, provide a detailed quote, and explain the permitting process.
SolarEnergy.ai can connect you with vetted solar professionals who also offer electrical security system services. Their network includes installers who understand the nuances of combining these two systems. They can perform an on-site energy survey to assess your property and design a custom solution. Additionally, they offer emergency lighting and security system upgrades, making them a one-stop shop for your energy and safety needs.
Before signing a contract, verify that the installer carries liability insurance and workers' compensation. Check that they will handle all necessary permits and inspections. Ask about warranties on both equipment and workmanship. A typical solar panel warranty is 25 years, while batteries have shorter warranties, often 5 to 10 years. Security equipment usually has a 1 to 3 year warranty. Make sure you understand what is covered and for how long.
Future Trends in Solar Security
The intersection of solar and security is evolving. Artificial intelligence (AI) is playing a bigger role in both energy management and threat detection. AI-powered cameras can distinguish between a person and an animal, reducing false alarms. They can also learn your property's normal patterns and alert you to anomalies. On the energy side, AI optimizes when to charge batteries based on weather forecasts and your usage history. This synergy is making integrated systems smarter and more efficient.
Battery technology is also improving. Solid-state batteries and advanced lithium chemistries are increasing energy density and cycle life. This means smaller, lighter batteries can store more energy, making them easier to install in existing homes. Vehicle-to-grid (V2G) technology is emerging, allowing electric vehicles to power your home and security system during outages. This could be a game-changer for homeowners who already own an EV.
Finally, policy changes are encouraging the adoption of solar plus storage. Many states are offering incentives for battery systems that provide backup during grid emergencies. Some utilities are even creating virtual power plants, where residential batteries are aggregated to support the grid. In return, homeowners receive financial credits. This makes the economics of solar security even more attractive.
As these trends develop, the case for integrating your security with solar becomes stronger. You are not just buying a product; you are investing in a resilient, self-sufficient future. Whether you are a homeowner looking to protect your family or a business owner safeguarding assets, the combination of solar and security is a wise choice.
To get started, request a free consultation from a qualified installer. They can assess your property, discuss your security needs, and provide a tailored quote. With the right design and installation, you can enjoy clean energy and robust protection for years to come. The sun is your ally, and with the right integration, it can also be your sentinel. NewSolarQuotes