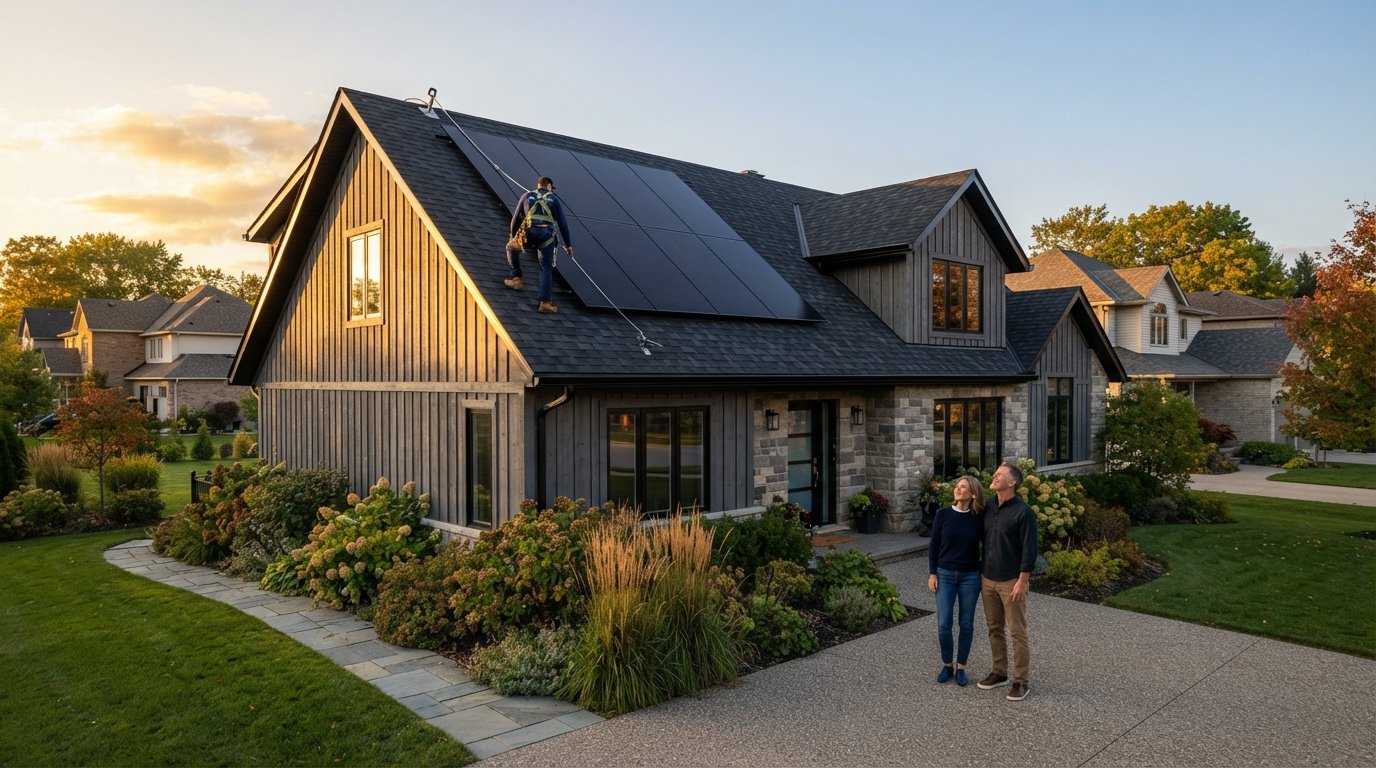
Solar Panel Aesthetics: How to Blend Panels Into Home Design
Solar panel aesthetics how to blend panels into home design: discover all-black panels, hidden mounts, and layout tips that keep your curb appeal intact.

By Dylan Harris
Learn more about Solar Panel Installation and Repair for guides, costs, and what to expect.
Compare Solar Panel Installation and Repair Pros Near You

Enter your ZIP code to compare top-rated local professionals and request free quotes.
Your roof is one of the most visible features of your home, and the decision to install solar panels inevitably raises a design question: will they look good, or will they look like an afterthought bolted onto your roofline? The good news is that modern solar technology has evolved far beyond the bulky, blue-tinted panels of the early 2000s. Today, homeowners can choose from a wide range of products designed specifically to complement residential architecture, and with thoughtful planning, a solar array can actually enhance your home's curb appeal rather than detract from it.
Solar panel aesthetics have become a genuine selling point in the industry, not just a niche concern. Manufacturers now produce all-black panels, building-integrated photovoltaic tiles, and low-profile mounting systems that sit nearly flush with the roof surface. Architects and solar designers increasingly work together to align arrays with roof geometry, hide conduit runs, and select panel colors that match shingles or metal roofing. The result is that a well-designed solar installation can look intentional, integrated, and even elegant.
This guide walks through the practical strategies, product choices, and design principles that help you blend solar panels into your home design. Whether you have a historic bungalow, a modern minimalist build, or a standard suburban colonial, there are aesthetic options worth exploring before you sign a contract.
Why Solar Panel Aesthetics Matter More Than Ever
For years, the solar industry focused almost exclusively on efficiency and cost per watt. Aesthetics were secondary, and many homeowners accepted visible panels as the price of going green. That calculus has shifted. As solar adoption has spread across the United States, competition among manufacturers has driven innovation in form factor as well as performance. Companies now recognize that a homeowner who dislikes the look of a proposed array may walk away from the project entirely, even if the financial payback is strong.
There is also a practical dimension. Homeowners associations (HOAs) in many states have rules about visible roof modifications, and while some states have laws protecting solar rights, the approval process often goes more smoothly when the design is clean and intentional. Real estate professionals note that a poorly placed or visually jarring solar array can slow a home sale, while a sleek, integrated system can be a selling point. In short, aesthetics are not vanity; they affect approval, resale, and long-term satisfaction.
Beyond resale and regulations, there is the simple daily experience of pulling into your driveway. A home is a personal space, and most people want their energy upgrades to feel like an improvement, not a compromise. The strategies below help ensure that outcome.
Choose the Right Panel Type for Visual Integration
The single biggest factor in how your solar array looks is the panel type itself. Not all solar panels are created equal when it comes to appearance, and the differences go well beyond color. Understanding the main categories helps you have a more productive conversation with your installer.
Monocrystalline panels are the most common choice for residential installations in 2026. They offer high efficiency and, in their all-black variants, a uniform, sleek appearance. The cells are cut from a single crystal, which gives them a consistent dark color with no visible grain or pattern. When paired with a black frame and black backsheet, these panels can nearly disappear against a dark shingle roof. Polycrystalline panels, by contrast, have a characteristic blue, speckled look because they are made from multiple crystal fragments. They are typically less expensive but harder to blend into most residential designs.
Thin-film panels, including cadmium telluride and copper indium gallium selenide (CIGS), offer a different aesthetic profile. They can be made semi-transparent or integrated into glass, which makes them popular for certain architectural applications. However, for standard rooftop installations, they are less common due to lower efficiency. Building-integrated photovoltaics (BIPV) represent the most seamless option: solar tiles and shingles that replace traditional roofing materials entirely. These products cost more, but they eliminate the panel-on-roof look altogether.
When comparing options, ask your installer to show you sample panels in natural daylight, not just catalog photos. Color temperature and reflectivity can look very different on a screen versus on your actual roof. If you are working with a solar professional through a platform like SolarEnergy.ai, you can request quotes from multiple installers and compare the specific panel models they propose, including their visual characteristics.
Design Principles for Blending Panels Into Your Roof
Even the most attractive panel can look out of place if the array layout ignores the geometry of your roof. Good solar design borrows principles from architecture: symmetry, alignment, and proportion. A skilled designer will treat the array as a compositional element, not just a collection of rectangles.
One of the most effective approaches is to align the array with existing roof features. If your roof has a prominent ridge, valleys, or dormers, the panels should relate to those lines rather than cutting across them at odd angles. Rectangular arrays that follow the roofline look intentional; staggered or irregular layouts can look haphazard. In many cases, it is worth sacrificing a small amount of energy production to achieve a cleaner visual result. A slightly smaller array that looks integrated will often satisfy a homeowner more than a maximum-output array that dominates the roof.
Symmetry is another powerful tool. If your home has a symmetrical facade, consider placing equal-sized arrays on both sides of the roof, even if one side produces less energy. The visual balance can be worth the trade-off. On the other hand, if the roof is asymmetrical, a single well-placed array on the most visible plane may be better than trying to force balance where it does not exist.
Here are some practical guidelines for layout:
- Keep panels parallel to the roof edge and ridge lines whenever possible.
- Avoid placing panels where they will be partially shaded by chimneys or dormers, as this creates both performance and visual issues.
- Group panels in a single rectangular block rather than scattering them across multiple roof planes.
- Leave consistent margins (typically 6 to 12 inches) between the array and roof edges for a framed look.
- Consider the view from the street, not just from above; what looks tidy on a satellite image may look cluttered from the curb.
These guidelines are not absolute rules. Every roof is different, and a good designer will adapt them to your specific architecture. The key is to think of the array as part of the home's design language, not an isolated technical system.
Mounting Systems and Hidden Hardware
The way panels are attached to your roof affects both appearance and durability. Traditional racking systems use visible metal rails and clamps, which can interrupt the clean lines of an all-black panel. Low-profile and hidden mounting systems have become increasingly popular because they minimize visible hardware and create a more streamlined look.
Flush-mount systems sit close to the roof surface, reducing the shadow and visual bulk of the array. Some manufacturers offer integrated framing that conceals the rails entirely, so all you see is the panel surface. If you are particularly concerned about aesthetics, ask about rail-less mounting options, which attach panels directly to the roof deck with concealed brackets. These systems can be more expensive and may have different structural requirements, but they deliver a noticeably cleaner result.
Conduit and wiring are another often-overlooked visual element. Exposed conduit running down the side of a house can undermine an otherwise attractive installation. Ask your installer how they plan to route wiring, and request that conduit be painted to match the roof or siding, or hidden within the attic or walls where possible. Small details like this make a big difference in the final appearance.
If you are also considering solar for water heating, you may want to read our guide on solar panel heater systems, which covers how to integrate thermal panels with your overall home design.
Color, Material, and Roofing Choices
The color and material of your roofing have a major impact on how well solar panels blend in. Dark shingles, such as charcoal or black asphalt, provide a low-contrast background for all-black panels, making them almost invisible from a distance. Lighter roofs, including white or light gray, create a stark contrast that highlights the array. If you are due for a roof replacement, this is an ideal time to consider a color that will work well with solar.
Metal roofs offer another advantage: standing seam metal roofs can accommodate clamp-on mounting systems that require no drilling, preserving the roof's integrity and creating a very clean attachment. The panels sit slightly above the metal surface, but the uniform color and reflectivity of the metal can make the array look like part of the original design. Some homeowners even choose to install solar on a newly built home with a metal roof specifically for this reason.
For those who want the ultimate in integration, solar shingles and tiles are worth investigating. These products look like traditional roofing materials, from asphalt shingles to clay tiles, but generate electricity. They are more expensive and often less efficient than standard panels, but they offer a seamless appearance that no add-on panel can match. If your primary concern is aesthetics and budget is less of a constraint, this is the premium option.
It is also worth noting that panel color is not limited to black. Some manufacturers offer panels in a range of colors, including gray, bronze, and even green, to match different roofing materials. These options may have slightly lower efficiency, but they can be a good compromise for historic homes or distinctive architecture.
Landscape and Property-Level Integration
Solar panels do not have to go on the roof. Ground-mounted arrays can be a better aesthetic choice for certain properties, especially those with large yards or homes where the roof is highly visible from the street. A ground mount can be positioned to take advantage of the best sun exposure while being screened by landscaping, fencing, or distance.
Landscaping is a powerful tool for blending ground-mounted solar into the property. Evergreen shrubs, ornamental grasses, or a low fence can hide the mounting structure without shading the panels. In some cases, a ground mount can even become a design feature, such as a solar pergola or carport that provides shade while generating power. These structures serve a dual purpose and can look intentional rather than utilitarian.
For rooftop arrays, the surrounding landscape can also help. Trees that frame the house can draw the eye away from the roof, and strategic plantings can soften the visual impact of a large array. However, be careful not to plant trees that will grow tall enough to shade the panels, as this will reduce production. A solar designer can help you balance aesthetics and performance.
Another option is to integrate solar into ancillary structures, such as a detached garage, shed, or barn. This can keep the main house roof clean while still capturing solar energy. If the structure is visible from the street, the same design principles apply: choose all-black panels, align them neatly, and hide the wiring.
Working With Installers to Achieve Your Vision
Communication is critical. Many solar installers focus on engineering and cost, and they may not ask about your aesthetic preferences unless you bring them up. Before you sign a contract, make it clear that appearance matters to you. Ask to see renderings or photos of similar installations on homes like yours.
A good installer will welcome this conversation. They can offer options for panel models, mounting hardware, and layout that you may not have considered. They can also advise on trade-offs: for example, a slightly smaller array with a cleaner layout may produce only a few percent less energy but look significantly better. If an installer dismisses your aesthetic concerns or refuses to discuss options, that is a red flag.
When you request quotes through a service like FreeSolarPowerQuotes, you can compare proposals from multiple companies side by side, including the specific equipment and design approach each one recommends. This makes it easier to find an installer who shares your design sensibilities. You can also ask for references from past clients and, if possible, visit a completed installation to see the work in person.
Financing and incentives can also influence your choices. In some cases, the federal solar tax credit and state or local rebates can make premium aesthetic options more affordable. Be sure to verify current incentive details with a qualified tax professional or official sources, as programs change over time.
Common Aesthetic Mistakes to Avoid
Even with good intentions, some design choices can undermine the look of a solar installation. One common mistake is mixing panel types or colors on the same roof. This almost always looks unintentional, even if it was done for performance reasons. Stick with a single panel model for a cohesive appearance.
Another mistake is ignoring the view from the street. Homeowners sometimes focus on the roof plan and forget how the array will look from the front yard or driveway. Take photos from multiple angles and ask your installer to provide a visual simulation from the most important viewpoints.
Finally, do not overlook the small details. Exposed conduit, mismatched trim, and poorly sealed penetrations can make even a high-end array look sloppy. Insist on a clean installation with hidden wiring and painted conduit where necessary. These details are what separate a professional job from an amateur one.
Balancing Aesthetics, Performance, and Budget
Every solar project involves trade-offs. All-black panels and hidden mounting systems cost more than standard options. Solar shingles cost more still. A perfectly symmetrical layout may produce less energy than a haphazard one. The right balance depends on your priorities and your home's specific characteristics.
For many homeowners, a middle path works well: choose all-black monocrystalline panels with a black frame, use a low-profile mounting system, and work with your installer to align the array with roof lines. This approach delivers a clean, modern look without the premium price of fully integrated solar tiles. If your roof is dark and your array is well-placed, the panels may be barely noticeable from the street.
If aesthetics are your top priority and budget allows, building-integrated photovoltaics or solar shingles offer the most seamless result. For those with the right property, a ground-mounted array screened by landscaping can be both attractive and highly functional. There is no single correct answer; the best choice is the one that fits your home, your values, and your financial situation.
As solar technology continues to advance, the gap between performance and appearance is narrowing. Manufacturers are investing in new materials and designs that make solar power an asset to home design rather than a compromise. With careful planning and the right partners, you can enjoy the financial and environmental benefits of solar while keeping your home's curb appeal intact.